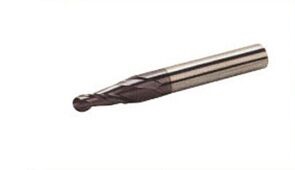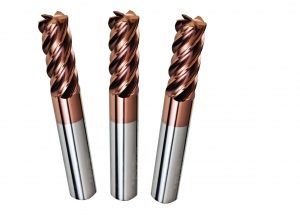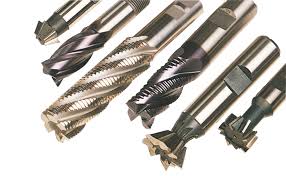
Application of end mill-Aerospace Manufacturing

In the industry, the clamping system is appropriate may greatly affect the processing efficiency, especially in the processing of high strength materials. Because of the characteristics of the processing of materials, medical devices and cutting the aerospace manufacturing industry need to use a large number of blades. With the passage of time, the consumption of time become a replacement blade a major factor in productivity. In addition, in the processing of small parts of aerospace manufacturing industry, high performance commonly used, long cutting materials will cause the chip breaking problem.

QS tool with high precision cooling device clamping system can not only shorten the knife and tool change time, but also can improve the cutting performance and processing. The wedge design so that the operator can in a few seconds. Blade replacement precision nozzle can provide accurate coolant flow, so as to improve the quality of the parts and chip breaking performance. Good is the cooling fluid pressure is reduced to 145 pounds per square inch.

In the aerospace industry, the application of spiral milling (slope milling) processing technology can improve productivity. This technique uses the cutter (rather than bits) arc common in many aircraft parts in the inclined surface and more efficient processing of various hole hollow cavity characteristics. Through cutting speed with small cutting depth and high, spiral milling the required cutting force and machine power than drilling were greatly reduced. Spiral milling cutter for micro parts, a sharp cutting edge can provide high removal rate and wear resistance of longer distance and better processing.

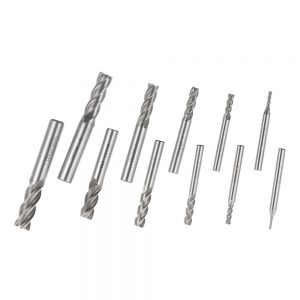
Application of end mill-Medical Technology 1

Medical device manufacturing

Medical device manufacturers face many of the same and electronic component manufacturers challenge. Due to the increasing demand for medical and dental devices, the manufacturer must speed up production, improve the predictability of cost efficiency and processing. The medical device quality and high corrosion resistance is extremely important, but the most commonly used materials: titanium alloy and cobalt chromium alloy it is very difficult to machining. In order to meet the requirements of the implant body, must use the corrosion resistance and good abrasion resistance, biocompatibility of small materials, but these materials (especially artificial hip) may be very difficult to process.

A common feature of many medical devices is the thread profile of the complex, with the high precision machining. Bone screw challenges often lies in its large slenderness ratio. The screw length is far greater than its diameter, making the process more difficult, because the processing screw is easily bent. In addition, now a lot of bone screw requirements greater by spiral angle with single blade screw thread tool for processing more difficult.

Thread milling (a cutting edge is arranged at the inner cutter instead of peripheral milling process) is a processing method with higher productivity. This technology is very suitable for the Swiss type CNC lathe, because between the tool and the guide sleeve of the short distance, is conducive to enhancing support and reduce the vibration.

With a whirlwind thread milling process processing of medical bone screws. The blade is arranged on the inner ring around the thread of whirlwind milling cutter rotating cylindrical workpiece and machining threads, smooth tangential cutting motion can reduce the cutting force, improve the rate of metal removal.

In order to reduce the chatter (the maximum possible problem of thread milling) and prolong tool life, manufacturers should choose not to install screw blade equidistant ring. Because it is a whirlwind mill processing of high strength materials, milling insert should bear a great impact, so we must choose high hardness and fine grain matrix and coated blade wear resistant coating, to prolong tool life and improve the surface finish.

Micro machining and application

In micro machining, the size of parts may be very small, and what kind of cutting tools and processing options can be a variety of choices. Because micro machining faces various challenges, therefore, the choice of the correct machining method is of great importance.

By optimizing the processing technology of small parts, the parts and components can be saved, the processing cycle is shortened, the tool cost is reduced, the idle time of machine tools is reduced and the processing quality of parts is improved

With the progress of technology, in order to help improve the production efficiency of small parts, has a reliable application, can provide technical support and consultation tool partners is very important. Usually, according to different industries and processing types to determine the improvement of the cutting process is a good starting point.

Manufacturing of electronic and telecommunication products

All kinds of electronic and telecommunication products of components, but the processing of these parts of the challenges are similar: the part to be processed in batch, and the quality of the parts and the surface roughness of the extremely stringent requirements. In addition, in the rapid development of science and technology in the industry, the pressure to cut costs is very large.

Because of the function of the spare parts requirements continue to improve, more and more electronic products with hard processing materials, it has also become another obstacle to the processing of these parts. Micro tool suitable for processing many electronic components (such as the fine structure of the disc tray), the processing usually involves the inner circle turning, cutting, cutting and thread processing.

As a result of such processing requirements of precision, therefore, choose a safety clamping system can ensure the correct positioning of the cutting edge of indexable insert type lathe tool is very important. With the lathe tool, the best use of small feed rate cutting at the beginning, in order to ensure the safety of the blade and the machining surface finish, and then improve the the feed rate in order to improve the chip breaking performance. In addition, should also be the cutting depth is greater than the radius, with a common problem as much as possible to reduce the blade radial variation — this is the diameter in processing.

Improving the tool life by selecting tool geometry parameters-2

Considerations

The factors that affect the tool durability can be divided into five aspects: cutting parameters, geometric parameters of the tool, workpiece material, cutting tool materials, grinding quality of the tool and lubrication cooling conditions.

Effect of cutting parameters on tool durability

Cutting: cutting speed V, feed rate and cutting depth of F AP on the influence of tool life is: the increasing of cutting parameters, the cutting temperature, tool wear faster, tool durability decreased. But due to the cutting speed, feed rate and cutting depth three influence on cutting temperature in different degrees, so the impact on the the tool life is different.

Effect of tool geometry parameters on tool durability

The rake angle of the tool life is very obvious, the angle is too large, reduce the strength of blade, poor heat dissipation, easy to damage; the angle is too small, and the cutting force and cutting temperature increase too much, the two cases in which the durability will decrease, rake angle effect on tool durability a hump shape, the top corner of life. To reduce the main angle kappa gamma 1, increase the strength of the cutter, improve heat dissipation, increased durability. In addition decreasing angle kappa gamma and increasing the corner radius can improve cutting strength, improve heat dissipation, so that the tool wear is high. The tool geometry the parameters have significant influence on the tool life, is one of the important signs of tool geometric parameters are reasonable and advanced or not.

Effect of workpiece material on tool durability

The strength of the workpiece material, the higher the hardness, cutting temperature is higher, so the tool wear more quickly, cutting the lower durability. Cutting carbon steel, carbon steel has great influence on the tool life. The higher the carbon content, cementite and pearlite of the greater proportion, hardness the higher the tool wear is very fast. Therefore high carbon steel cutting tool wear faster, durable low carbon steel; cutting tool wear is relatively slow, the durability is relatively high. In addition the extension of main factors of processing material durability, improved tool materials elongation or low thermal conductivity, are the cutting performance of cutting, the hardness of the material cutting temperature, tool wear is reduced. The material, its wear resistance is higher. The cutting part of the material is also a major factor affecting the tool life, improve the cutting performance, the hardness of the material, the Wear resistance is also high

Improving the tool life by selecting tool geometry parameters

The wear rate is slower, the tool life is higher, so the factors that influence the tool wear will affect the durability of cutting tools, and tool life is an important symbol to measure the cutting performance. So we need to analyze factors affecting the tool life, so as to effectively control the relationship between these factors, in order to get a reasonable tool life, the cutting tool has better performance.

Selection method

The first method is based on the principle of minimum single workpiece to develop durability, known as the highest productivity durability of Tp; the second method is based on the principle of minimum cost to make each workpiece durability, known as the lowest cost durability of Tc; the third method is based on the unit of time obtained the biggest profit to make durable is called the maximum profit durability of Tpr.

According to the analysis, the following relationships exist between the three durability factors, that is, the Tp selection factor.

For manufacturing and grinding tool is relatively simple, the cost is not high, such as turning, drilling, durability can be set low point; on the other hand, such as cutter, broach and gear cutting tool durability should be like, is a little higher.

For pocket knife, multi tool machine tool change and adjustable complex, modular machine tool and automatic machining tool, durability should be higher. Machine clip tool change time turning and ceramic cutting tools is short, can choose low durability.

The key to meet the production rhythm, in order to make the workshop production balance, the durability of the process should be low; when sharing one process per unit of time cost is larger, the durability of cutting tools should be low.

In order to avoid changing knives during the process of machining the same surface, the durability should be higher, and at least one knife should be completed

Production line tool durability should be stipulated as one or two classes, so as to be able to change the knife at the end of the shift.

Correct selection of tool presetting apparatus-5

Consider batch processing

In general, the use of various types of tool, machining workshop and rarely repeated processing of identical parts should use manual tool presetter. Most workshops are to buy manual presetter, they only need to measure the tool length and diameter. Often transform tool and the machining tasks of the workshop is usually used for manual presetting instrument, because they do not need to enter large amounts of data. This workshop has the tool presetter advantage is: if there is no pre setting instrument, the operator had to spend a lot of time on the machine on each tool for measuring.

We use various types of tools, the need for a large number of tool setting. Automatic tool presetter is not suitable for us, because we will not repeat the same processing parts. Using the tool, the parameters are reset by presetter, then you can direct a processing to the end of tool life.

A specific processing bias compensation data stored in a tool set table. The offset compensation value has been stored in the tool presetter, so we only need to set the desired length. Do not need to machine tool for sending data, because the length of the tool parameters have been set up. We only need to ensure that the tool is changed next, the length of cutting processing and processing time are the same.

However, in general, for those large batch processing workshop often use the same tool to repeat the same processing, automatic tool presetting instrument is a good choice. Batch processing workshop usually adopts the same tool and tool chuck, processing method and size tolerance has a little change. They are the best selection of automatic type presetter, because they want the operator is only required to be the tool clamping instrument to the spindle, press the button and let the instrument automatically completed the measurement tool, without human intervention.

Whether it is in the central processing workshop tool room or assembly tools in the workshop, presetter can work effectively. Closed design can provide protection for presetter sensitive parts, influence from the dust and cooling liquid, and the instrument is easy to clean. In addition, in order to prevent deformation, tool presetting instrument are often used for the good thermal stability of the material.

For a process shop, the investment in buying a tool presetting device ultimately depends on whether it can best improve productivity or improve machining operations.

Correct selection of tool presetting apparatus-4

Third kinds of measurement data using possibly offset compensation data is written to the RFID chip is pasted on the tool chuck. The machine uses a RFID reader to read these data. The control system is the use of the RFID chip, you can through multiple measurements to correct the measurement result. Through the analysis of these data. You can keep track of tool life, and before the parts size precision or surface finish problems timely replacement tool.

Preservation of measurement data

Using the tool presetter, can keep workshop tool presetting results, and stored in a database. If the processing workshop has a variety of different processing tasks, you need to set the table with management tool presetter. Set the table can be defined for each kind of processing tasks, and stored in a database if 6 months later encountered the same processing tasks, can be transferred to the part number, immediately know which need to use the tool.

Some tool presetter can also generate 2D profile tool. These high-end models can download the workpiece with complex shape DFX file, the user can be used as a template, the tool profile is compared with a specific contour is processed. In addition, users can also DXF file tool profile records in the pre adjustment apparatus, and send it to the CAD system, the control of the measurement of another file, or create a file. Can also be measured data output to the.Mastercam software programming or verification software can tell the tool presetter tool in which the need for setting, these data will be stored in the presetter in the database.

Correct selection of tool presetting apparatus-3

Utilization of measurement data

In the choice of tool presetting instrument, processing workshop, one of the main problems is the need to ask: how to use the offset compensation of the measured data, there are three basic ways. First of all can use the presetter built-in label printer or by connecting the computer, the measurement results will be printed on a label. This information may include the tool ID number, knife number, tool length, diameter, nose radius and cutting angle of two, as well as the measurement tool operator information, measurement time and date. The printing labels, the operator is no longer required for manual records. However, the operator will still need to manually input data control system of offset machine therefore, there are still some input errors.

Another way is to use will be sent directly offset the measured data to the processing machine. This method is called data postprocessing, to obtain a set of measurement data from the tool presetter, creates a data file, and the file will be sent to the machine. The machine reads the file, and the data input control system. Because most of the processing workshop machine has been networking, or have adopted the distributed numerical control system, machining program is sent to the machine controller so that the user may want to use the network to transfer data from tool presetter to processing machine.

Although a tool presetter may have to send data to the offset compensation function of machine, but sometimes still need to manually input data processing workshop. Senior Manufacturing Engineer Jeff Campbell said, “a few sets of machining center can usually share a tool presetter. Some machine tools can automatically receive data offset compensation tool presetter sending the other machine cannot. For example, we have two sets of independent data offset compensation TOYOTA horizontal machining center can automatically receive presetter sent. These machine tools have matrix knife capacity, each machine can accommodate nearly 500 of the tool, in addition to tool replacement worn or damaged, all the tools are stored in the machine.

Tool wear or breakage are automatically transferred to the tool assembly station, by the operator to remove it. The operator to measure the new tool in the tool presetter, and print out the tool label with offset compensation data. Then, the machine tool returned by the operator, and the data manual input machine on the label.

Correct selection of tool presetting apparatus-2

Selection of tool presetting instrument

Select the tool presetter should know, in most cases, the measuring range of the instrument is unable to expand, this point is very important. Therefore, the maximum length and diameter of processing workshop must be clearly measured tool, buy to meet the presetter this kind of demand, and greater leeway tool size may arise in the future the tool presetter. There is no limit on the minimum size of tool. Select the tool presetter, need another factor to consider is the different handle type used in the workshop. The adapter or interchangeable spindle presetter manufacturers can provide alternative, to adapt to a variety of different types of hilt. However, processing the workshop should be clear, so we need to pay extra.

Another consideration is the tool presetter installed on the way. The basic presetter is adsorption tool assembly clamped on the spindle apparatus by gravity or vacuum. The tool presetter is high-grade usually uses a retention knob to the clamping tool. Using the vacuum gripper. If the handle is dirt or oil, or the operator will not spindle hole clean, it may cause measurement error. Some tool presetter can be used in addition to other clamping, clamping tool is also equipped with a heat shrinkable function, and built an induction heating device.

Correct selection of tool presetting apparatus-1

Many workshops are not willing to spend money to buy the tool presetter, because they do not belong to the processing equipment, can not directly create economic benefits. But in fact, and in the machine tool measuring tool, compared with automatic tool measuring system or the use of machine tools with the machine use the tool presetter tool can shorten the machine downtime, and to obtain long-term rewards more lucrative.

1.function and characteristic

The tool presetting instrument is mainly used to measure the length and diameter of the cutter, and other functions include measuring the radius of the tool nose, the angle of cutting and the angle of the tool. They can also be used to detect whether the cutting edge of the tool is damaged or not

The machine shop foreman Connecticut, a manufacturing of aerospace parts said, “we use the axial offset of tool presetting instrument to adjust the tool. We use many copying tool, such as forming cutter and cutter tool on the orifice, many different angles and radius measurement. In addition, we also use the tool pre adjusting instrument to adjust the boring bar, boring boring set in diameter.” before the pre setting instrument with edge detection function, the crosshair with image tool move, the operator can be adjusted to a given diameter boring head.

2.manual and automatic measurement

The tool presetter now can display real-time imaging tool on the computer screen by using video imaging technology. Using this manual presetting instrument, the operator can be moving the camera to be measured at the edge of the tool, the tool image displayed on the monitor. The measurement software including the crosshair can automatically capture the cutting edge, thus no need to move to the edge of the cutter is fixed at the crosshair.

Automatic tool presetter driven by CNC system. Operator is only required to be fitted to the tool presetter, and start the macro program of mobile camera, to carry out the automatic measurement of any type of tool. The repeatability precision of tool presetting instrument usually + 2 M. tool presetter can adopt different coordinate system. Therefore, if the operator to the tools used in measuring machine No. 1, you can call this a group of zero; tool in measuring machine No. 2, you can also call it a group of zero.